Tuesday 15 December 2015

Why do My Drawings Look Childish? Answer: Your Left Brain is Ruining Your Drawing

During my term teaching life drawing, I came across students who struggled to draw. These were adult students who had plucked the courage to begin drawing after bringing up children or pursuing a career. Others were young adults who had yet to move on from cartoonish drawings that are highly stylized. This is often a disguise for frustration at capturing what is really in front.

So why so some intelligent adults who have great skills or talents in other sectors find it hard to draw?

Shut Up Left Brain!

Hemispheres of the brain
The answer lies in how the brain is wired, causing a sort of picture dyslexia. Our brains are split into two hemispheres, the left and the right. The left hemisphere is where the speech centre is located, and therefore is verbal, bossy, labels things and edits the world to make it make sense. The right hemisphere is silent, has great spatial awareness and sees things how they really are.

Hemispheres of the Brain and Drawing Ability

Skewed ellipses
Ever noticed how hard it is to draw whilst having a conversation? This is because the speech centre in the left brain is being engaged, but it is the right brain that possesses drawing ability. Drawing whilst talking is like juggling several balls at once. This is not desirable for drawing.

The right brain does not label things, but sees the world as it really is. It has good spatial and visual awareness. In order to draw well, the left hemisphere needs to be subdued and the right brain promoted.

This means to stop seeing the world with ‘objects’ with labels, such as, ‘this is how a how a house looks. It has windows, a door, a roof and a chimney.’ From some angles, none of these might be visible. Some houses look odd from certain vantage points. Photographs will testify, yet our left brains insists upon making things make sense.

Signs the left brain is interfering with the right brain whilst drawing might some or all of the examples:
  • Limbs on figures are too thin and/or short. Similarly, hands and feet too small.
  • Eyes on portraits are too far up the head.
  • Skulls of human profiles are too shallow.
  • Angles on buildings recede at impossible angles in foreshortening.
  • Ellipses on objects are wonky or skewed.
  • Impossible vanishing points in streets.
  • In general, the drawing might appear lob-sided squashed up or just plain wrong, for no identifiable reason.

Drawing is cornerstone to painting
You see, the left brain edits the world. Facial features are perceived as more important than the spaces between, such as the forehead or the depth of the skull, so these are rendered smaller than they actually are. The same applies to hands and feet, as they are noticed less than the other features of the body.

And so it can be seen that those who struggle to draw are experiencing a dilemma between the two brains. They see the world in different ways. Betty Edwards’ book, ‘Drawing on the Right Side of the Brain’, as well my book ‘Draw What You See Not What You Think You See’ explores this dilemma in full.

For now, be assured that a lack of drawing ability is simply due to a lack of brain training. This means recognizing when the pesky left brain is ruining your drawing.

Tips for Improving Drawing

Try the following exercises, designed to forestall the left brain. These will subdue your left brain and encourage your right brain to come through.

During the drawing process, turn your drawing upside down now and again. This will cut off the left brain’s familiar view of the world, and render your drawing into a series of lines and contours that are less familiar. You may notice skewed angles, wonky lines and accuracy issues.

View your drawing through a mirror. In similar fashion to viewing it upside down, this will create an unfamiliar view of your drawing.

Get some distance. Yes, get out of your chair and look at your drawing from afar. Your right brain sees things as a whole rather than in its parts. Getting a distant view means mistakes can more easily be spotted, as it will be seen in context of the rest of the drawing.

Leave the room for two minutes. Not looking at the drawing for a few minutes will have the effect of rebooting the brain and gaining a fresh view. You can also leave the room periodically during drawing to improve your visual memory.

Remember to keep looking at the objects in front whilst drawing. Often, I have seen my students sit close to their drawings without even looking at the subject matter. They are more concerned with polishing off the shading or straightening a line. Disappointment awaits once they stand back and realize their perfectly-fashioned drawings are inaccurate.

Handedness and Drawing Ability

I personally don’t believe that handedness has any relevance to drawing ability. This is to quash the pervading belief that left handed people are better drawers than right. I don’t find this to be true, although creativity and style are a separate matter.

Right handed people can be as good at drawing as left handed people, as drawing entails good hand to eye coordination and accuracy. Having said this, I have noticed that people who have ambidextrous tendencies, i.e., those who have low lateralization in a preference for which side of the body they use to perform tasks (brushing hair, kicking a ball, etc..) experience difficulty with drawing. Low lateralization also seems to come in tandem with poor coordination, incidences of dyslexia and directional difficulties. After research, I have also found higher frequency of drawing difficulties within people who have low lateralization.

More Articles on Drawing Exercises

Thursday 10 December 2015

Why Artists Cannot Mix Any Color from Artist Starter Kits: Missing Vital Colors and Useless Pigments

My students often lament that they cannot mix any color they want from a so-called artist kit of pigments brought from the art shop. It is little wonder when I see the range of colors supplied. More often than not, you will find a ‘red’, ‘yellow’ and a ‘blue’ of some sort. You will also find a brown or a range of browns, a black, a green and (incredibly the same tube size as the other colors of) titanium white.

Overrated Pigments in Artist Kits

Art Kits with Redundant Pigments
It is little wonder that the beginner in oil painting or acrylics cannot mix the colors desired. This is because, for starters, the misconception of what a primary color is. You see, it is believed that any color can be mixed by the inclusion of red, yellow and blue in the kit. But some reds, yellows and blues are not primary colors. Cadmium red is not a primary color because it contains a lot of yellow. Thin this pigment down and you will see a slightly yellowish tinge in the wash. A clean purple cannot be achieved by including cadmium red in a red/blue mix. Similarly, ultramarine is not a primary blue as it contains a lot of red, bringing a violet hue. Therefore clean greens will not be possible by including this color.

An artist kit is only as good as the vibrancy of secondary colors it can bring. These are violet, green and red (orange is in fact a tertiary color). Overly bright secondary colors can always be muted down by adding brown or an opposing color, cannot be made more ‘bright’. The primary colors are cyan, yellow and magenta, not any red, yellow or blue.

Why Black Pigment is not Vital

Another problem is black. I say black, because I do not understand why black is included at all, except for a monochrome project. Black can be achieved by mixing any red, yellow and blue and is seldom needed in everyday art. And why would black be added to any color, except to create unconvincing shadows or to dirty a color.

The same applies to ‘yellow ochre’ and ‘sap green’. Because of their association with the old masters, modern artists believe these pigments to be vital to any pigment selection. I personally find them useless and dirty.

We Need More White Pigment in Artist Kits

And finally, the most important pigment of all: titanium white. Why do these artist kits include white of the same tube size as the other pigments? Colors can be darkened by adding its complimentary color (the opposite color, for example by adding violet to yellow). But a color cannot be lightened without white. Lightening a color forms a fundamental part of color mixing. And yet the artist kit often contains the same tube size of white as the other colors.

Below find my evaluation of the pigment choices found within the artist paint kit:

Daler Rowney Graduate Oil Selection Set.
Within you will find: lemon yellow, cadmium red (hue), crimson, ultramarine, sap green, yellow ochre, burnt sienna, burnt umber, ivory black and titanium white.

Issues: There is no primary red. Both cadmium red and crimson contain yellow to some degree. Sap green, ivory black and yellow ochre are not needed – unless you want to mix dirty colors. The tube of white is the same size as the other pigments.

Daler Rowney Georgian Oil Color Introduction Set
Within you will find: lemon yellow, cadmium yellow hue, yellow ochre, burnt sienna, cadmium red hue, alizarin crimson, French ultramarine, sap green, lamp black and titanium white.

Issues: Yellow ochre, sap green and lamp black are not needed unless you like dirty colors. There is no primary blue, so mixing a clean green will be virtually impossible. The tube of white is the same size as the other colors.

Winsor and Newton Watermixable oil colors set of 10
Within you will find: lemon yellow, cadmium yellow, cadmium red (deep), alizarin crimson, ultramarine, cerulean blue, pthalo green, yellow ochre, burnt umber, titanium white.

Issues: Yellow ochre. It is not needed. Titanium white is the same tube size as the other pigments. Mixing a clean violet may be tricky, as cadmium red (deep) is the closest approximation to a primary red. Other than that, the pigment is not too bad compared to the artist kits.

Winton’s Oil Color Paint Starter Set Ten
Within you will find: cadmium yellow pale hue, cadmium red deep hue, French ultramarine, phthalo blue, viridian hue, permanent green light, yellow ochre, burnt sienna, ivory black and titanium white.

Issues: Permanent green light, yellow ochre and ivory black are not needed. With such as limited choice of colors, every pigment should be made to count. Titanium white is the same size tube as the other pigments. Secondary colors will be possible but not the cleanest, most vibrant sort. Quite a few colors here will remain relatively unused.

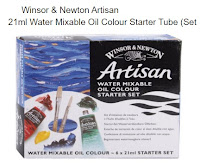
Winton’s Watermixable Artisan Starter Kit of 6
Within you will find: permanent alizarin crimson, cadmium yellow, phthalo green-blue shade, French ultramarine, yellow ochre and titanium white.

Issues: yellow ochre is not a vital pigment, unless dirty colors are the aim. Titanium white is the same size as the other pigments. Other than that, not a bad selection compared to the others.

The Best Artist Selection Kit of Pigments for Beginners

I will often select my own art pigments individually rather than purchase a box of pigments. would recommend lemon yellow, cadmium yellow (pale), cadmium red, permanent rose (quite close to magenta, but don’t buy art tubes labeled ‘magenta’ as this may contain impurities).

Also recommended are ultramarine, pthalo blue (or cerulean). Both have some properties of cyan. Finally, I find burnt sienna and burnt umber creates warm, rich neutrals and darks. And finally, a big tube of titanium white. Luxuries are alizarin crimson (and old favorite) and viridian green. Yes, criticized for its overuse in painting foliage, but it can be tempered with other colors to create lovely greens.

Some pigment manufacturers sell pigments with the word ‘process’ or ‘permanent’ to denote a color close to the true primary color, for instance, ‘permanent blue’ will resemble ‘cyan’ of printing ink, a true primary color.

Mare Articles about Primary Colors and Pigments

Myths of the color wheel
The four states of colour
color temperature and opacity
My science of color site
Advice on buying artbrushes

Wednesday 9 December 2015

I’ve Never Used Oil Paints Before: What are Oils and How Can I Use Them?

Starting out in oil painting? Well you might notice that every art shop will stock traditional oil paints. Tubes bearing the word ‘oils’ or ‘oil paint’ (meaning the same thing) will also bear other labels, such as the brand name, grade and quality. It all seems overwhelming. However, oil paints all have one thing in common. The pigment is simply suspended in oil. This mean the paint cannot be cleaned or thinned with water but artist spirits and special oils.

Oil Painting Exercise for Beginners in Art

Using Oils for the first time
Deposit a little oil paint onto an art board, and you will find a creamy, rich substance rather like butter. What you see is finely ground pigment blended with a little oil. The pigment aspect might be ground organic substance or a synthetic substitute. This provides the color. But the pigment is nothing without a vehicle in which it can travel. With watercolors, it is water; in this case of, oils, it is, well, oil.

The Thickness of Oil Paint

But not any oil is used in the paint, but one that is stable and resistant to darkening over time. So you will not find household cooking oil, but linseed oil. Linseed oil will be found in most tubes of oil paint with the exception of white, where poppy oil will be used, as it is paler.

Oils can be applied in many ways.

Applied neat, oil paint will leave ridges and troughs, rather like the textures after a rough session of plastering. Such a technique is known as ‘impasto’. Artists such as Van Gogh, Monet and Picasso used impasto techniques to bring a textural quality to their paintings. A stiff brush or a palette knife can be used to apply thick oil paint for impasto effects.

Can Oil Paint be Used like Watercolor?

It might be hard to believe, but oils can yield similar effects to watercolor if thinned down and applied as a wash. In oil painting, such a wash is known as a ‘glaze’. As previously mentioned, oils cannot be thinned with water, but a medium that can be suspended in the oil paint. A range of oil mediums and artist thinners can be found in shops, but the ones most often used are linseed oil and artist spirits. Artist spirits are simply solvents designed to be used for oil painting.

Never use industrial Turps or solvents for thinning oil paint, for these are not designed for artist use. (They smell terrible and will wear the brushes).

Artist spirits and linseed oil will be found in bottles. Don’t worry, as odor-free solvents that are kind to the nose and brush can be easily found in any art shop, and only a little medium is needed.

Create a little oily-solvent mixture (by blending 50:50 solvent and linseed oil into a small dish) to create an oily ‘thinner.’ Add a little paint. The result will be a watercolor-like wash. This thinned paint can be spread over an artboard or canvas like watercolor.

Just like with watercolor, you will need to experiment to get the consistency right. Too much thinner, and the wash will be too thin. Not enough, and the paint might not create a thin wash to travel.

Glazing Oil Paint in Layers

The great thing about oil paint is that once it is dry, the paint is remarkably robust and durable. In fact, a separate glaze can be applied on top once the paint is dry, and the underlayer will remain unaffected. This is known as glazing. Beautiful effects can be achieved by glazing thin layers of oil paint one over the other.

What are the Difference Between Watercolors and Oil Paints?

Here, I have described the two main techniques of oil paint that define its properties: impasto by the application of neat oil paint, and glazing by the application of thinned oil paint.

Oils are fundamentally different to watercolors, for water is used in watercolors, but cannot be used in oil paints. Oil paint does not dry by evaporation, as does watercolors do, but by oxidization. This means that the paint absorbs oxygen from the air in order to harden. For this reason, the paint dries from within, taking about three days to two weeks to become touch-dry. A thicker layer of oil paint will take longer to harden than a thin layer.

Because oil paints take longer to dry, it can be played around, blended with and manipulated without the need to rush. Great blending finishes can be achieved with oil paints, unlike acrylics, which will dry within the hour. Blending is no fun if put under time restraints!

Oil Paints in Simple Terms

Don’t be confused by the many different types of oil paints that can be found in shops. Really, the traditional type has one thing in common: oil is blended with the powdered pigment to create the paint. Exceptions can be found in specialized oil paint, which do not apply to traditional oils, the subject of this article.

So have a go. Learn the basics of oil paint by applying it neat, and then by thinning the pigment down into a watercolor-like wash.


More Exercises with Oil Paint